HTTPS (Hypertext Transfer Protocol Secure) and SSL (Secure Sockets Layer) certificates are essential for any website that wants to establish trust and security with its users. These certificates encrypt the data that is transmitted between a user’s web browser and your website, protecting sensitive information such as login credentials and credit card information. In this blog post, we’ll walk you through the process of setting up HTTPS and SSL certificates for your website.
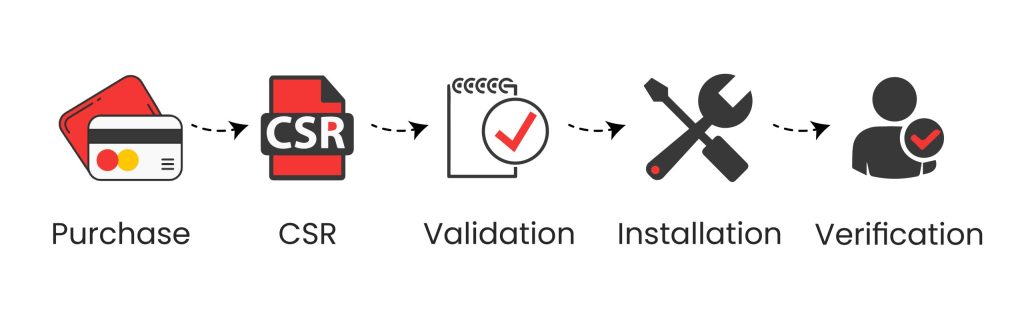
Step 1: Purchase an SSL certificate
The first step to setting up HTTPS and SSL certificates for your website is to purchase an SSL certificate from a reputable certificate authority (CA). Some popular CAs include DigiCert, GlobalSign, and Comodo. Prices vary depending on the type of certificate you purchase and the length of the validation period.
Step 2: Generate a certificate signing request (CSR)
Once you’ve purchased your SSL certificate, the next step is to generate a certificate signing request (CSR) on your web server. The CSR is a file that contains information about your website, such as the domain name and the organization that owns it. This information is used by the CA to verify your identity and issue the SSL certificate.
Step 3: Verify your domain ownership
After generating the CSR, the next step is to verify your domain ownership. This step is necessary to ensure that you are the legitimate owner of the domain for which you are requesting an SSL certificate. The CA will provide instructions on how to verify your domain ownership, which typically involves adding a specific TXT record to your domain’s DNS settings.
Step 4: Install the SSL certificate
After your domain ownership has been verified, the CA will issue your SSL certificate. You will need to install the SSL certificate on your web server, which will typically involve uploading the SSL certificate and the private key to your server and configuring the server to use the SSL certificate.
Step 5: Configure your website to use HTTPS
The final step is to configure your website to use HTTPS. This involves updating the links on your website to use the HTTPS protocol instead of HTTP, and redirecting all traffic to the HTTPS version of your website. This can typically be done using server-side redirects or by updating your website’s configuration files.
In conclusion, setting up HTTPS and SSL certificates for your website is a simple process that can be done by following these five steps. It’s an important step to ensure that your website is secure and trustworthy for your users. Remember to renew your SSL certificate before it expires, to maintain the security of your website.